SSD - Install and Transfer the Operating System

How to Physically Install a SSD and Transfer the Operating System


Introduction

If you never owned an SSD, you have missed something. Yes, they are not cheap, but Dollar per Dollar there is no other piece of hardware that can give you as much additional performance than an SSD.

Because SSDs are expensive, their current use is for placing the operating system. That’s how you get the best mileage. Although XP and Vista can be installed on SSDs, it is recommended to use them for Windows7, which is the first system to support Trim.

For desktops, an SSD with a 60GB capacity is usually sufficient. The user data can be moved to the HDD – I will explain the procedure later. Should you have very large programs, e.g., games, you should move their program files during the installation of the game to the HDD too.

For laptops, the situation is more complicated because you usually have only one disk bay. I use 80GB and 90GB SSDs on my laptops. In addition, I use the HDD that I recovered from the laptop after I installed the SSD in an external USB enclosure. But, if you move around a lot with the laptop, that may not be so convenient and a bigger SSD (120GB or 250GB) may be in order (budget allowing).


Hardware Installation

For a desktop, you will need a bracket if it is a 2.5” SSD (like most today). But, there are also 3.5” SSDs that will fit without adaptor brackets into the disk bays. You also need a cable to attach the SSD to the motherboard. For electricity, there is usually an extra plug at the PSU which you can use for the SSD’s.

Once you have all those bits, you can install the SSD in an available disk bay – or if none available, some self-adhesive Velcro will also do. The SSDs are light and do not produce any vibration or heat.

For a laptop, you need an external enclosure that attaches to a USB port. That will allow you to make the initial SSD setups. The one I linked attaches via USB2 and eSata, which may be practical later to use as external drive with the HDD that you recovered from the laptop. Also for hot swapping bare bone HDDs. But there are cheaper enclosures for USB2 only and also some that allow attachment to USB3.

Transfer the Operating System

There are two ways to transfer the operating system from your current HDD to the SSD:
1. The Geeky way which comes for free and
2. The easy way that costs $19.95.

1.The Geeky way requires the following steps:

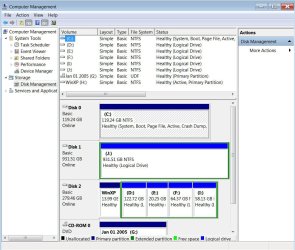
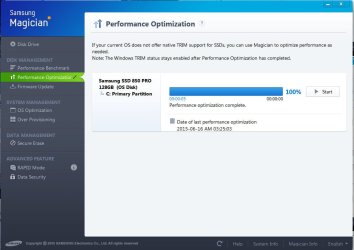
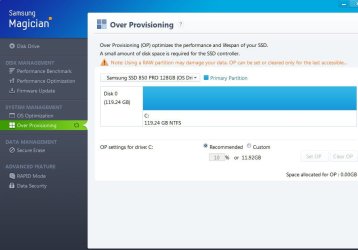
Prepare the SSD – You first have to initialize the SSD to create the MBR. You can do that with Disk Management or with this program (which you will need later anyhow).

Then you need to align the SSD and define an active partition on it. You use an elevated Command Prompt with the following commands:

Diskpart
List disk
Select disk n (where n is the number that was given for your SSD in List disk)
Clean
Create partition primary align=1024
Format fs=ntfs quick
Active (assuming you want to install an OS)
Exit

Note: If you are more comfortable working with Disk Management, you can also define a primary active partition with Disk Management. On a SSD, the partition will be automatically aligned by 1024.


If you want to verify that the alignment is correct, you use these commands:

Diskpart
List disk
Select disk n
List partition


You should see a result like this:

Partition ### Type Size Offset


------------- ---------------- ------- -------
Partition 1 Primary 59 GB

1024 KB - but 64KB or any number divisible by 4 is also good. The offset has to be divisible by 4.

In Windows7, you may have the 100MB active boot partition. The easiest way to deal with that is to move the bootmgr to the C: partition using EasyBCD. That you do on your HDD before you transfer anything to the SSD. Then you do not have to worry about it and you need only transfer the C: partition to the SSD.


But if you care to keep the 100MB partition, then the partition you just created on the SSD is for that 100MB partition. The next step is to shrink the partition you just created to a 100MB size (make sure it is not any smaller). With Disk Management you will have trouble to do that. I recommend this program for the operation.

From the free space you gained, you create the C: partition for the OS. This partition must not be active and need not be a primary (because the 100MB partition contains the boot manager).

Alternatively and easier is if you first create the 100MB partition with these commands:

Diskpart
List disk
Select disk n (where n is the number that was given for your SSD in List disk)
Clean
Create partition primary size=100 align=1024
Format fs=ntfs quick
Active
Exit

Note: The unit in the size parameter is MB

After this action you can use Disk Management to create the C partition from the remaining unallocated space. That can be a logical partition.

If there is no 100MB partition, things are easy. The partition you created with Command Prompt will receive the C partition including boot manager and all.

There may be more partitions on your factory HDD – e.g., the Recovery partition and a Tools Partition. Those you should not transfer to the SSD because of space constraints. I would back them up – e.g., with an imaging program. The Recovery Partition you can also burn to DVDs.

The OS transfer

This is done with an image. There are a variety of free imaging programs (e.g., the free editions of Macrium, Paragon, Acronis, etc.) that are suitable for the task. You can also use the Windows7 imaging, which has the advantage that it deals with the 100MB active boot partition automatically. Disadvantage is that you never know exactly what it does.

You image your partitions to an external disk (you may have to assign a drive letter to the 100MB partition so that the imaging program can identify it) and then pull the images back in to the SSD (using the bootable recovery program of the imaging program).
The recovery is partition by partition. So you have to make separate runs for the 100MB partition (if any) and the C: partition.

Note: Many free imaging programs cannot shrink the originating partition to fit into the usually much smaller C: partition on the SSD - even if the amount of data in that partition would fit. In that case you will need to shrink the C: partition on the HDD prior to imaging it. The HDD C: partition must be smaller or equal in size to the designated partition on the SSD. For that operation I also recommend this program because Disk Management might not be able to shrink it enough. Note: Free Macrium can image to a smaller disk if the data fits.

It is, of course, understood, that the amount of data on your HDD C: partition must not exceed the capacity of the designated C: partition on the SSD. Should you have more data on your HDD C: partition than the size of the SSD C: partition can hold, I suggest you first create a data partition on the HDD system and move the user data there. Here is my video tutorial that explains how this is done. When you finally are on the SSD system, you then right click on the user folders in the data partition (Documents, Pictures, etc.) and Include them into the appropriate library. That approach does not require you to move the user folders later.

Next step is to change the boot sequence in the BIOS to set the SSD as second boot device (leave the CD/DVD reader as first boot device) and, hopefully, your system will boot.

2.The easy way for transferring the OS requires you to purchase this program. It does everything for you – alignment, deals with the 100MB partition, transfers C:, shrinks the originating partition, etc. All you will have to do is change the boot sequence.

Note: Before you activate the SSD, it is recommended to set the BIOS to AHCI. Best time to do that is just before you change the boot sequence. Once Windows7 is running, you make the corresponding settings in the OS. Here is a tutorial on how to do that.
Many people claim that there is a significant performance gain with AHCI. I, however, did not see that. But it may be different from system to system.

Settings after the OS transfer

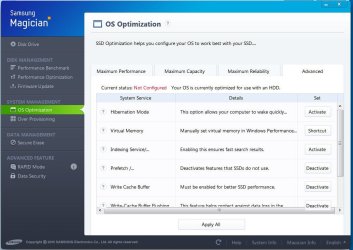
Disk Defragmentation makes no sense on an SSD. For a laptop, go into Services, navigate to Disk Defragmenter, right click on it and go to Properties. Here you set the service to Disabled.
For a desktop, you may want to disable defrag in the Disk Defragmenter and only for the SSD so that the remaining HDDs can still be defragmented.

Note: As long as Defrag Service is turned off, you cannot shrink any partition. The partition shrink process requires the Defrag service. If you need to shrink a partition later, turn the Defragmentation Service temporarily on.

Hibernation File – most of us do not use Hibernation, but Sleep instead. But, the hiberfile takes precious space on your SSD – to the same tune as the size as your RAM. To get rid of it, run the following command in elevated Command Prompt: powercfg –h off. If you ever want it back, it is powercfg – h on.

Superfetch – many “experts” suggest to turn Superfetch off. I think that is not appropriate. Fetching a program or data from RAM is still a lot faster than fetching it from a disk – even from an SSD.

There are no other settings that are necessary. On the SSD forums you will find a lot of tweaks. I recommend you stay away from them.


Move the user folders to the HDD

To move the user folders to the HDD is very simple. Create a Data partition on the HDD. Define folders in that partition – e.g., Documents, Music, Pictures, etc. One for each folder you want to move off the SSD. The name of those folders can be anything. The system will rename them anyhow. It is just more obvious if you call them by the same name as the originating folders.

Then, open the Explorer and right click on, e.g., My Documents folder (not the Documents Library) in the left pane. Go to Properties and click on the Location tab. Here you click on Move and navigate to the corresponding folder in your Data Partition on the HDD. Then you Select that folder and Apply it.

Very Important: You must move the SSD folder to the corresponding Data Partition folder – NOT to the root of the partition itself. That would create a mess.


Last edited:
Please tell me what is it drive J: ? What I can do with it?
 

Attachments

  • 2015-06-12_local_disks.jpg
    2015-06-12_local_disks.jpg
    102.6 KB · Views: 100

My Computer

Computer type
PC/Desktop
Computer Manufacturer/Model Number
custom build
OS
Windows 7 Home Premium 32bit
CPU
Intel Core i5-2500K
Motherboard
Asus P8Z68-V
Memory
4 GB (2x2) DDR3-1333 Ram
Graphics Card(s)
ASUS nVidia GeForce GT630 2 GB DDR3 128 bit
Hard Drives
300GB Seagate Barracuda 7200.9 16MB SATA-II NCQ
Antivirus
AVG free
Browser
Chrome
Please tell me what is it drive J: ? What I can do with it?
 

Attachments

  • 2015-06-12_disk-J.jpg
    2015-06-12_disk-J.jpg
    60.6 KB · Views: 115
  • 2015-06-12_local_disks.jpg
    2015-06-12_local_disks.jpg
    102.6 KB · Views: 88

My Computer

Computer type
PC/Desktop
Computer Manufacturer/Model Number
custom build
OS
Windows 7 Home Premium 32bit
CPU
Intel Core i5-2500K
Motherboard
Asus P8Z68-V
Memory
4 GB (2x2) DDR3-1333 Ram
Graphics Card(s)
ASUS nVidia GeForce GT630 2 GB DDR3 128 bit
Hard Drives
300GB Seagate Barracuda 7200.9 16MB SATA-II NCQ
Antivirus
AVG free
Browser
Chrome
What happens when you click on it above? Do you have flash stick or external plugged in?

It may be a virtual drive which is AVG bloatware. I would not run AVG at all.
 
If I click on it, I get en error message:
J:\ is not accessible.
Access is denied.
I do not have flash stick or external plugged in.
The J: is also shown in Disk Management without file system though.
I am waiting for AVG to finish (it takes forever).
 

My Computer

Computer type
PC/Desktop
Computer Manufacturer/Model Number
custom build
OS
Windows 7 Home Premium 32bit
CPU
Intel Core i5-2500K
Motherboard
Asus P8Z68-V
Memory
4 GB (2x2) DDR3-1333 Ram
Graphics Card(s)
ASUS nVidia GeForce GT630 2 GB DDR3 128 bit
Hard Drives
300GB Seagate Barracuda 7200.9 16MB SATA-II NCQ
Antivirus
AVG free
Browser
Chrome
That's why I run AVG:
 

Attachments

  • 2015-06-12_AVG.jpg
    2015-06-12_AVG.jpg
    87.5 KB · Views: 95

My Computer

Computer type
PC/Desktop
Computer Manufacturer/Model Number
custom build
OS
Windows 7 Home Premium 32bit
CPU
Intel Core i5-2500K
Motherboard
Asus P8Z68-V
Memory
4 GB (2x2) DDR3-1333 Ram
Graphics Card(s)
ASUS nVidia GeForce GT630 2 GB DDR3 128 bit
Hard Drives
300GB Seagate Barracuda 7200.9 16MB SATA-II NCQ
Antivirus
AVG free
Browser
Chrome
After AVG has finished, I clicked on J: in Windows Explorer and it shown the empty folder:
This folder is empty.
See also Disk Management capture.
Now, I know that it is a new 1 GB disk (HDD).
 

Attachments

  • 2015-06-12_931GB.jpg
    2015-06-12_931GB.jpg
    51.8 KB · Views: 89
  • 2015-06-12_1GB_Disk.jpg
    2015-06-12_1GB_Disk.jpg
    224.3 KB · Views: 145

My Computer

Computer type
PC/Desktop
Computer Manufacturer/Model Number
custom build
OS
Windows 7 Home Premium 32bit
CPU
Intel Core i5-2500K
Motherboard
Asus P8Z68-V
Memory
4 GB (2x2) DDR3-1333 Ram
Graphics Card(s)
ASUS nVidia GeForce GT630 2 GB DDR3 128 bit
Hard Drives
300GB Seagate Barracuda 7200.9 16MB SATA-II NCQ
Antivirus
AVG free
Browser
Chrome
Greg, why did you said: "I would not run AVG at all." ? Is there a problem with AVG PC TuneUp 2015 ?
 

My Computer

Computer type
PC/Desktop
Computer Manufacturer/Model Number
custom build
OS
Windows 7 Home Premium 32bit
CPU
Intel Core i5-2500K
Motherboard
Asus P8Z68-V
Memory
4 GB (2x2) DDR3-1333 Ram
Graphics Card(s)
ASUS nVidia GeForce GT630 2 GB DDR3 128 bit
Hard Drives
300GB Seagate Barracuda 7200.9 16MB SATA-II NCQ
Antivirus
AVG free
Browser
Chrome
Windows 7 doesn't need any tweaking suites to maintain it. They only get in the way and cause problems. I would uninstall AVG completely and avoid those kinds of programs.

J appears to be a 1tb data drive which is already formatted Logical. Go ahead and run a full Disk Check
on it.

Everything that works best for installing and maintaining Win7 is here. You will get and keep a perfect install to the exact extent you stick with only the tools and methods in Clean Reinstall Windows 7 just like 1.5 million others have without a single complaint.
 
Thank you very much.
 

My Computer

Computer type
PC/Desktop
Computer Manufacturer/Model Number
custom build
OS
Windows 7 Home Premium 32bit
CPU
Intel Core i5-2500K
Motherboard
Asus P8Z68-V
Memory
4 GB (2x2) DDR3-1333 Ram
Graphics Card(s)
ASUS nVidia GeForce GT630 2 GB DDR3 128 bit
Hard Drives
300GB Seagate Barracuda 7200.9 16MB SATA-II NCQ
Antivirus
AVG free
Browser
Chrome
Every time I reboot or restart my PC, during the boot process the check disk is activated and starts checking the drive C:
How I can stop this?
Depends on the results of the chkdsk. If it has to repair a lot of records, then something is wrong with your disk.
 

My Computer

Computer Manufacturer/Model Number
HP, Dell, Gateway, Toshiba - 4 laptops and 2 desktops
OS
Vista, Windows7, Mint Mate, Zorin, Windows 8
CPU
from 1.6GHz Duo to i7
Monitor(s) Displays
2x HP w2207
Hard Drives
5x HDD, 7x SSD, 12x Externals
Keyboard
with trackball - no mices
Mouse
Trackball mice
Internet Speed
DSL 6000
The results of the chkdsk - everything is OK.
But when I reboot/restart the computer, the chkdsk starts and checking again.
 

My Computer

Computer type
PC/Desktop
Computer Manufacturer/Model Number
custom build
OS
Windows 7 Home Premium 32bit
CPU
Intel Core i5-2500K
Motherboard
Asus P8Z68-V
Memory
4 GB (2x2) DDR3-1333 Ram
Graphics Card(s)
ASUS nVidia GeForce GT630 2 GB DDR3 128 bit
Hard Drives
300GB Seagate Barracuda 7200.9 16MB SATA-II NCQ
Antivirus
AVG free
Browser
Chrome
Which drive is triggering the Disk Check?

Unplug all other drives to run the maker's HD Diagnostic extended CD scan.

If in doubt test them all. For drives without scans use Seatools CD. For SSD, use the manufacturer's testing tool on its Support Downloads web page.
 
Drive C: - the SSD drive
 

My Computer

Computer type
PC/Desktop
Computer Manufacturer/Model Number
custom build
OS
Windows 7 Home Premium 32bit
CPU
Intel Core i5-2500K
Motherboard
Asus P8Z68-V
Memory
4 GB (2x2) DDR3-1333 Ram
Graphics Card(s)
ASUS nVidia GeForce GT630 2 GB DDR3 128 bit
Hard Drives
300GB Seagate Barracuda 7200.9 16MB SATA-II NCQ
Antivirus
AVG free
Browser
Chrome
Drive C: - the SSD drive

If still under one year warranty contact the manufacturer's tech-support to help you test the drive for possible RMA. A drive which continually triggers disk check is likely faulty.

Did you unplug the other drives to determine this with certainty?
 
I downloaded Samsung Magician, see screenshot. It shows that:

1. AHCI mode is Activated. AHCI mode is ON
2. SATA Interface - SATA 6GB/s (SATA 3) Connected
3. OS Optimization - Not Configured. Your OS is currently optimized for use with an HDD...
When I go to the OS Optimization page, it said: Current status: Not Configured. Your OS is currently optimized for use with an HDD.

I'll attach the other pages.
On the Over Provisioning page, it said:
Note: Using a RAW partition may damage your data. OP can be set or cleared only for the last accessible partition.
and also:
Volume may be corrupted. Use 'Chkdsk' to fix the corruption problem and then try again.

Please tell me what to do.
 

Attachments

  • 2015-06-16_SSD.jpg
    2015-06-16_SSD.jpg
    163.1 KB · Views: 209
  • 2015-06-16_OS-Optimization.jpg
    2015-06-16_OS-Optimization.jpg
    158.8 KB · Views: 133
  • 2015-06-16_Over_Provisioning.jpg
    2015-06-16_Over_Provisioning.jpg
    121.7 KB · Views: 164
  • 2015-06-16_Firmware.jpg
    2015-06-16_Firmware.jpg
    91.9 KB · Views: 131
  • 2015-06-16_Performance_Optimization.jpg
    2015-06-16_Performance_Optimization.jpg
    98.9 KB · Views: 147
  • 2015-06-16_Benchmark.jpg
    2015-06-16_Benchmark.jpg
    132 KB · Views: 150

My Computer

Computer type
PC/Desktop
Computer Manufacturer/Model Number
custom build
OS
Windows 7 Home Premium 32bit
CPU
Intel Core i5-2500K
Motherboard
Asus P8Z68-V
Memory
4 GB (2x2) DDR3-1333 Ram
Graphics Card(s)
ASUS nVidia GeForce GT630 2 GB DDR3 128 bit
Hard Drives
300GB Seagate Barracuda 7200.9 16MB SATA-II NCQ
Antivirus
AVG free
Browser
Chrome
I'd apply all optimizations on the 0S optimizations page to see if that helps.

Did you find the drive testing tool? Check for firmware update and do the performance test above to see if that is sufficient.
 
Did you find the drive testing tool?
No, there are no SSD drive listed under the Samsung.

I applied all optimizations (see the screenshot), after that PC rebooted and "chkdsk' was activated again ... and nothing
Over Provisioning page remains the same.

Firmware: This is the latest firmware (see the firmware screenshot in my previous post #835).
The Performance Benchmark screenshot is attached.
 

Attachments

  • 2015-06-16_OS-Optimization.jpg
    2015-06-16_OS-Optimization.jpg
    128.6 KB · Views: 132
  • 2015-06-16_Over_Provisioning.jpg
    2015-06-16_Over_Provisioning.jpg
    118.4 KB · Views: 125
  • 2015-06-16_Benchmark.jpg
    2015-06-16_Benchmark.jpg
    155.8 KB · Views: 118

My Computer

Computer type
PC/Desktop
Computer Manufacturer/Model Number
custom build
OS
Windows 7 Home Premium 32bit
CPU
Intel Core i5-2500K
Motherboard
Asus P8Z68-V
Memory
4 GB (2x2) DDR3-1333 Ram
Graphics Card(s)
ASUS nVidia GeForce GT630 2 GB DDR3 128 bit
Hard Drives
300GB Seagate Barracuda 7200.9 16MB SATA-II NCQ
Antivirus
AVG free
Browser
Chrome
I forgot Performance Optimization, here is a screenshot.
 

Attachments

  • 2015-06-16_Performance_Optimization.jpg
    2015-06-16_Performance_Optimization.jpg
    109.9 KB · Views: 128

My Computer

Computer type
PC/Desktop
Computer Manufacturer/Model Number
custom build
OS
Windows 7 Home Premium 32bit
CPU
Intel Core i5-2500K
Motherboard
Asus P8Z68-V
Memory
4 GB (2x2) DDR3-1333 Ram
Graphics Card(s)
ASUS nVidia GeForce GT630 2 GB DDR3 128 bit
Hard Drives
300GB Seagate Barracuda 7200.9 16MB SATA-II NCQ
Antivirus
AVG free
Browser
Chrome
Re: Over Provisioning page.
I've noticed that when Over Provisioning page is loading it's showing as in the screenshot below, and after a few seconds changed as in my previous post.

It suggests to set a small partition for SSD controller.
 

Attachments

  • 2015-06-16_Over_Provisioning_1.jpg
    2015-06-16_Over_Provisioning_1.jpg
    106 KB · Views: 151

My Computer

Computer type
PC/Desktop
Computer Manufacturer/Model Number
custom build
OS
Windows 7 Home Premium 32bit
CPU
Intel Core i5-2500K
Motherboard
Asus P8Z68-V
Memory
4 GB (2x2) DDR3-1333 Ram
Graphics Card(s)
ASUS nVidia GeForce GT630 2 GB DDR3 128 bit
Hard Drives
300GB Seagate Barracuda 7200.9 16MB SATA-II NCQ
Antivirus
AVG free
Browser
Chrome
Back
Top