How to Unassociate File Extension Types in Vista, Windows 7, and Windows 8
Information
This tutorial will show you how to unassociate a file extension to no longer have a default program to open it with afterwards in Vista, Windows 7, and Windows 8.
You must be logged in as an administrator to be able to unassociate file types.
You must be logged in as an administrator to be able to unassociate file types.
Note
These are free standalone EXE program that run without installing anything on your computer.
CONTENTS:
- Option One: Unassociate File Type using "FileTypesMan" Program
- Option Two: Unassociate File Type using "Unassociate File Types" Program
- Option Three: Unassociate File Type using "Unassociate" BAT file
OPTION ONE
Unassociate File Type using "FileTypesMan" Program
NOTE: This program supports running in XP, Vista, Windows 7, and Windows 8.
1. Download the ZIP file for the same 32-bit or 64-bit FileTypesMan at the bottom of the site below as your 32-bit or 64-bit Windows.
FileTypesMan - Alternative to 'File Types' manager of Windows
2. Open the downloaded filetypesman.zip or filetypesman-x64.zip, and extract (drag and drop) all files to the desktop.
3. Run the extracted FileTypesMan.exe file.
4. If prompted by UAC, click/tap on Yes (Windows 7/8) or Continue (Vista).
5. In the top pane, select one or more "extensions" (ex: .txt) that you wish to unassociate. (see screenshot below)
Note
To select random multiple file extensions:
Press and hold the Ctrl key while clicking on extensions to select them, then release the Ctrl key when finished.
To Select everything inbetween two selected file extensions including the selected file extension:
Select an extension, press and hold the Shift key, click on another extension to select them and everything inbetween them, then release the Shift key.

6. When finished with step 5, click/tap on Edit (menu bar) and Delete Selected Extensions. (see screenshot below)

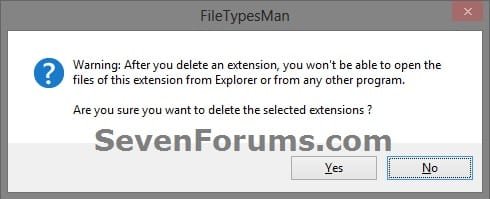
7. Click/tap on Yes to confirm. (see screenshot below)
8. When finished, you can close FileTypesMan if you like.
OPTION TWO
Unassociate File Type using "Unassociate File Types" Program
NOTE: This program only supports running in Windows 7 and Vista. Windows 8 is not supported.
1. Download the ZIP file for the free Unassociate File Types program under Attachements towards the bottom of the site at the link, and save it to your desktop.
2. Open the downloaded unassoc.zip, and extract (drag and drop) all files to the desktop. (see screenshot below)

3. Run the extracted Unassoc.exe file.
4. If prompted by UAC, click/tap on Yes (Windows 7) or Continue (Vista).
5. To Unassociate a File Extension Type
A) Click/tap on a file extension type from the list in the left pane to select it. (see screenshot below step 7)
B) Click/tap on Remove file association (User). (see screenshot below step 7)
6. To Delete a File Extension Type
A) Click/tap on a file extension type from the list in the left pane to select it. (see screenshot below step 7)
B) Click/tap on Delete file type. (see screenshot below step 7)
7. When finished, close the program.

OPTION THREE
Unassociate File Type using "Unassociate" BAT file
Note
1. Click/tap on the Download button below to download the Unassociate.bat v2.2.1 file.
Download
2. Save the .bat file to your desktop, and unblock it.
3. Do step 4 or step 5 below for how you want to unassociate a file type with the Unassociate.bat file.
4. Drag and drop the file you want to unassociate on to the Unassociate.bat file, and go to step 7 below. (see screenshot below)

5. Right click on the Unassociate.bat file, and click on Run as administrator.
6. Enter the file extension that you want to unassociate, and press Enter. (see screenshot below)

7. Type Y to confirm. (see screenshot below)

8. The entered file extension is now unassociated for all users. (see screenshot below)

That's it,
Shawn
Related Tutorials
- Restore Default Windows 7 File Extension Type Associations
- How to Restore Default File Extension Type Associations in Windows 8
- How to Associate a File Type or Protocol Default Program in Window 7
- How to Associate a File Type or Protocol with a Program in Windows 8 and 8.1
- How to Set Default Associations for a Program in Windows 7
- How to Change Default Program of a File using "Open with" in Windows 8
- How to Disable "You have new apps that can open this type of file" Notification in Windows 8
- How to Hide or Show Known File Type Extensions in Windows 7
- How to Change the Default Program a File Type Opens With in Windows 7
- How to Change the Default Icon of a File Extension in Windows 7
- How to Create a Default Programs Shortcut in Windows 7
- How to Create a "Set Program Access and Computer Defaults" Shortcut
- How to Enable or Disable the "Set Program Access and Computer Defaults" Page
- How to Add "Show/Hide Known File Extensions" to Context Menu in Vista and Windows 7
Attachments
Last edited:
")
