USB Windows 7 Installation Key Drive - Create

How to Create a Bootable Windows 7 Installation USB Flash Drive


   Information
This will show you how to create a USB flash key drive that you can boot from to install Windows 7 with.
   Tip
If the USB flash drive is of sufficient capacity, say 8GB, then after copying the Windows 7 installation DVD onto it, you can create a new folder (ex: Device Drivers) in the USB key and place all of your latest driver installation files in it. This way you will have them handy to manually install the drivers after installing Windows 7 from the USB key.
   Note
If you booted from the USB drive to install Windows 7, then you may need to change the hard drive back to being listed before the USB key in the boot order in BIOS after the computer restarts during installation to prevent the computer from booting right back into the USB key starting the installation process over and over.
   Warning

  • The USB key needs to be at least 4 GB in size.
  • This will delete everything on the USB key. Be sure to save anything that you do not want to lose on it somewhere else.
  • Before installing Windows 7 from the USB key, you will need to:
    • Enable Legacy USB storage detect in the BIOS.
  • When ready to install Windows 7 from the USB key:
    • Connect the USB key.
    • Restart the computer, and keep tapping the F key (see screenshot below) responsible to open the Boot Menu screen for the brand and model of your motherboard or computer until it does.

      • Boot-Menu.png
    • Select the USB key to boot from.
    • Start installing Windows 7.

CONTENTS:
  • Option One: Use "Windows 7 USB/DVD Download Tool" to Create Bootable Windows 7 Installation USB
  • Option Two: Use "Rufus" to Create Bootable Windows 7 Installation USB
  • Option Three: Manually Create Bootable Windows 7 Installation USB Flash Drive


OPTION ONE

Use "Windows 7 USB/DVD Download Tool" to Create Bootable Windows 7 Installation USB


   Tip
If you do not have a Windows 7 ISO file, then you can either download the latest ISO version at the links below.

:ar: Microsoft Software Recovery

:ar: Microsoft: Windows 7 Direct Download Links

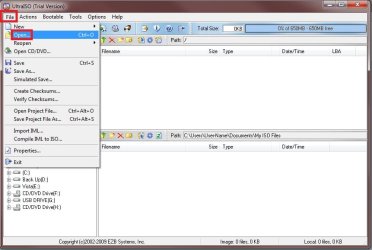
You could also use a free program like ImgBurn or ISODisk to create a ISO from your Windows 7 installation DVD.


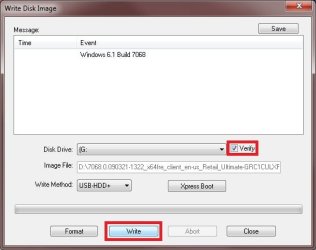
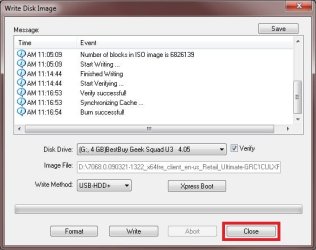
1. For how, see the Part 2 section here: Windows 7 USB/DVD Download Tool.


OPTION TWO

Use "Rufus" to Create Bootable Windows 7 Installation USB


1. Download the latest version of Rufus at the link below, and save it's .exe file to your desktop.
:ar: Rufus - Create bootable USB drives the easy way
   Note
This is a standalone exe file that doesn't install anything to your PC.

For Rufus FAQs, see: https://github.com/pbatard/rufus/wiki/FAQ


download_rufus.jpg
2. Connect your USB flash drive if you have not already.

3. Run the rufus_v###.exe file, and click/tap on Yes if prompted by UAC.
NOTE: ### = latest version number.

4. Set Rufus with the settings below: (see screenshot below step 5)

  • [Under Device, select the USB flash drive you want to format and use.
  • Under Format Options, check Create a bootable disk using, click/tap on the browse icon to navigate to and select your 64-bit Windows 7 ISO file.
  • Under Partition scheme and target system type, select MBR partition scheme for BIOS or UEFI computers.
  • Under File system, select NTFS.
  • Under Cluster size, select the (Default) (ex: 16 kilobytes or 4096 bytes) it has listed.
  • Under Format Options, check Quick format.
  • Under Format Options, check Create extended label and icon files.
  • Under New volume label, you can enter any name you like for the USB flash drive, or leave the default name.
5. When ready, click/tap on Start. (see screenshot below)
Rufus-1.jpg
6. Click/tap on OK to confirm. (see screenshot below)
Rufus-2.jpg
7. Rufus will now start creating the bootable UEFI USB flash drive. (see screenshot below)
Rufus-3.jpg
8. When Rufus is "DONE", you can close Rufus. (see screenshot below)
NOTE: It could take a little while to finish.
Rufus-4.jpg
9. You are now ready to installWindows 7 with your bootable USB flash drive.


OPTION THREE

Manually Create Bootable Windows 7 Installation USB Flash Drive


   Warning
Using this method:
  • You will only be able to create a 64-bit Windows 7 bootable USB flash drive if your current Windows 7 installation is also 64-bit.
  • You will be able to create a 32-bit Windows 7 bootable USB flash drive if your current Windows 7 installation is 32-bit or 64-bit.
64-bit installation + 64-bit ISO = 64-bit flash drive
64-bit installation + 32-bit ISO = 32-bit flash drive
32-bit installation + 32-bit ISO = 32-bit flash drive
32-bit installation + 64-bit ISO = unable to create

1. Plug the USB key in.

2. If AutoPlay opens a pop-up for the USB key, then just close it.
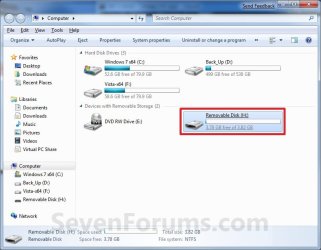
NOTE: Make note of what the drive size is for the USB key for use in step 6 below. You can also open Computer (step 19) to see what the drive size is to. For example, mine is 3920 MB. (See screenshot below)
Computer.jpg
3. Open an elevated command prompt.

4. In the elevated command prompt, type diskpart and press Enter. (See screenshot below)
Step1.jpg
5. In the elevated command prompt, type list disk and press Enter. (See screenshot below)
NOTE: Make note of what disk # your USB key is listed as to use in step 6 below. You can also look for the drive size (step 2) of the USB key to help ID the disk number. For example, mine is listed as Disk 1 here for the 3920 MB disk.
Step2.jpg
6. In the elevated command prompt, type select disk # (your USB disk #) and press Enter. (See screenshot below)
NOTE: For example, my USB key is listed as Disk 1, so I would type select disk 1 and press Enter.
Step3.jpg
7. In the elevated command prompt, type clean and press Enter. (See screenshot below)
Step4.jpg
8. In the elevated command prompt, type create partition primary and press Enter. (See screenshot below)
Step5.jpg
9. In the elevated command prompt, type select partition 1 and press Enter. (See screenshot below)
Step6.jpg
10. In the elevated command prompt, type active and press Enter. (See screenshot below)
Step7.jpg
11. In the elevated command prompt, type in the command below to format the USB as NTFS or FAT32, and press Enter. (See screenshot below)
NOTE: This may take a few moments to finish formatting the USB key.

   Note
You can substitute Windows 7 within quotes in the commands below with whatever name (drive label) you would like to have displayed for the USB drive instead.

See also: Choosing between NTFS, FAT, and FAT32


FAT32 volume labels
  • If you have an UEFI instead of BIOS motherboard, then you will need to use FAT32 and not NTFS.
  • Volume labels can contain as many as 11 characters and can include spaces but no tabs.
  • Volume labels cannot contain the following characters: ? / \ | . , ; : + = [ ] < > "
  • Volume labels are stored as uppercase regardless of whether they contain lowercase letters.
NTFS volume labels

  • Volume labels can contain as many as 32 characters.
format fs=ntfs label="Windows 7" quick

OR

format fs=fat32 label="Windows 7" quick

Step8.jpg
12. If AutoPlay opens a pop-up for the USB key, then just close it.

13. In the elevated command prompt, type assign and press Enter. (See screenshot below)
NOTE: This will assign a new drive letter to the USB key. Make note of the new USB drive letter to use in step 22 below. For example, mine is now H.
Step9.jpg
14. If AutoPlay opens a pop-up for the USB key, then just close it.

15. In the elevated command prompt, type exit and press Enter. (See screenshot below)
NOTE: This will exit you from DiskPart from step 4.
Step10.jpg
16. Close the elevated command prompt.

17. Insert your Windows 7 installation DVD into the DVD drive.

18. If AutoPlay opens a pop-up for the Windows 7 installation DVD, then just close it.

19. Open the Start Menu, right click on the Computer button, and click on Open.

20. Right click on the DVD drive (ex: E: ) that has the Windows 7 installation DVD in it, and click on Open. (See screenshot below)
Open.jpg
21. Highlight all of the contents, right click on the highlighted contents, and click on Copy. (See screenshot below)
NOTE: You will need to copy all of the files and folders on the Windows 7 installation DVD to the USB key.
Copy.jpg
22. Go back to Computer, right click on the USB key drive (ex: H ), and click on Paste. (See screenshot below)
Paste.jpg
23. The contents of the Windows 7 installation DVD will now start copying over to the USB key. (See screenshot below)
NOTE: This may take a few moments to complete.
Copying.jpg
24. When finished, you can close the Computer window and unplug the USB key.

25. You now have a Windows 7 Installation USB key. ;)

   Warning
If you have UEFI instead of BIOS motherboard, then you will need to temporarily disable Secure Boot to use the USB to install Windows. After installation is complete, you can enable Secure Boot again.

That's it,
Shawn


Attachments

  • Computer-9.jpg
    Computer-9.jpg
    57 KB · Views: 103
  • UltrISO-2.jpg
    UltrISO-2.jpg
    51.3 KB · Views: 13,126
  • UltrISO-3.jpg
    UltrISO-3.jpg
    69.4 KB · Views: 13,576
  • UltrISO-5.jpg
    UltrISO-5.jpg
    72.2 KB · Views: 15,194
  • UltrISO-6.jpg
    UltrISO-6.jpg
    23.1 KB · Views: 12,843
  • UltrISO-7.jpg
    UltrISO-7.jpg
    9.5 KB · Views: 11,222
  • UltrISO-8.jpg
    UltrISO-8.jpg
    34.5 KB · Views: 11,724
Last edited:
Hi, will try.
sub question: what shoud one choose, when the dvd blank is inserted and a two options dialog opens? What is the difference from cd dvd or usb.
Does that mean if you check usb, then all could be used to delete and copy as in pendrive.
This is a problem only with win 7 and more recent version. Whatever we select, it auto changes to udf format, which again poses problem when reading with xp machines , earlier versions.
 

My Computer My Computer

Computer type
PC/Desktop
Computer Manufacturer/Model Number
custom build
OS
Microsoft Windows 7 Ultimate 64-bit 7601 Multiprocessor Free Service Pack 1
CPU
Intel(R) Core(TM)2 Duo CPU E7200 @ 2.53GHz
Motherboard
To be filled by O.E.M. To be filled by O.E.M.
Memory
4.00 GB
Graphics Card(s)
NVIDIA GeForce 210
Sound Card
(1) NVIDIA High Definition Audio (2) Realtek High Definiti
Screen Resolution
1920 x 1080 x 32 bits (4294967296 colors) @ 60 Hz
Hard Drives
ST3500312CS ATA Device
Hi, I tried your suggestion, i could not copy that file to my desktop. It reads the same error. What that means, the dvd is having problem or the drive itself? Please
 

My Computer My Computer

Computer type
PC/Desktop
Computer Manufacturer/Model Number
custom build
OS
Microsoft Windows 7 Ultimate 64-bit 7601 Multiprocessor Free Service Pack 1
CPU
Intel(R) Core(TM)2 Duo CPU E7200 @ 2.53GHz
Motherboard
To be filled by O.E.M. To be filled by O.E.M.
Memory
4.00 GB
Graphics Card(s)
NVIDIA GeForce 210
Sound Card
(1) NVIDIA High Definition Audio (2) Realtek High Definiti
Screen Resolution
1920 x 1080 x 32 bits (4294967296 colors) @ 60 Hz
Hard Drives
ST3500312CS ATA Device
It means that the DVD is corrupted or damaged (smudge or scratch). You will need a new source. :(
 

My Computer My Computer

Computer type
PC/Desktop
Computer Manufacturer/Model Number
Self built custom
OS
64-bit Windows 11 Pro for Workstations
CPU
Intel i7-8700K OC'd to 5 GHz
Motherboard
ASUS ROG Maximus XI Formula Z390
Memory
64 GB (4x16GB) G.SKILL TridentZ RGB DDR4 3600 MHz
Graphics Card(s)
ASUS ROG-STRIX-GTX1080TI-O11G-GAMING
Sound Card
Integrated
Monitor(s) Displays
2 x Samsung Odyssey G7 27"
Screen Resolution
2560x1440
Hard Drives
1TB Samsung 990 PRO M.2,
4TB Samsung 990 PRO PRO M.2,
TerraMaster F8 SSD Plus NAS
PSU
Seasonic Prime Titanium 850W
Case
Thermaltake Core P3
Cooling
Corsair Hydro H115i
Keyboard
Logitech wireless K800
Mouse
Logitech MX Master 4
Internet Speed
2 Gb/s Download and 100 Mb/s Upload
Antivirus
Malwarebyte Anti-Malware Premium
Browser
Google Chrome
Other Info
Logitech Z625 speaker system,
Logitech BRIO 4K Pro webcam,
HP Color LaserJet Pro MFP M477fdn,
APC SMART-UPS RT 1000 XL - SURT1000XLI,
Galaxy S23 Plus phone
I am having a problem downloading Rufus. When I first tried from the Rufus site, I got into a loop where Rufus kept installing.
I eventually tried again using the link from this site and everything appeared to be going well until after the message 2/5 has been completed. After that I got a repeat warning that all data on the USB device will be destroyed, clicked ok and it started off again. But 2 hours later when I went back the green light indicator was full green but nothing appeared to be happening. Eventually I clicked on Close though it did not say DONE. Can I check if the USB has all the correct info without ruining the transfer, or do you think I should just try again ?

Or did I not wait long enough - there was no indication anything was happening.
 

My Computer My Computer

Computer type
PC/Desktop
Computer Manufacturer/Model Number
Mesh
OS
Windows 7 Home Premium Upgrade designed for Windows Vista
Browser
Internet Explorer
When Rufus has "Done" at the bottom, it has finished creating the bootable USB. :)

You could test booting from the USB to confirm if it works.
 

My Computer My Computer

Computer type
PC/Desktop
Computer Manufacturer/Model Number
Self built custom
OS
64-bit Windows 11 Pro for Workstations
CPU
Intel i7-8700K OC'd to 5 GHz
Motherboard
ASUS ROG Maximus XI Formula Z390
Memory
64 GB (4x16GB) G.SKILL TridentZ RGB DDR4 3600 MHz
Graphics Card(s)
ASUS ROG-STRIX-GTX1080TI-O11G-GAMING
Sound Card
Integrated
Monitor(s) Displays
2 x Samsung Odyssey G7 27"
Screen Resolution
2560x1440
Hard Drives
1TB Samsung 990 PRO M.2,
4TB Samsung 990 PRO PRO M.2,
TerraMaster F8 SSD Plus NAS
PSU
Seasonic Prime Titanium 850W
Case
Thermaltake Core P3
Cooling
Corsair Hydro H115i
Keyboard
Logitech wireless K800
Mouse
Logitech MX Master 4
Internet Speed
2 Gb/s Download and 100 Mb/s Upload
Antivirus
Malwarebyte Anti-Malware Premium
Browser
Google Chrome
Other Info
Logitech Z625 speaker system,
Logitech BRIO 4K Pro webcam,
HP Color LaserJet Pro MFP M477fdn,
APC SMART-UPS RT 1000 XL - SURT1000XLI,
Galaxy S23 Plus phone
Thanks Brink. I am very cautiously working my way through gregrocker`s resume for clean reinstall - Factory OEM Windows 7. Making a copy of the .iso is the first stage as you know. I am nervous of opening the USB because I don`t want it to start booting before I have been through the intervening stages recommended by gregrocker. If I run into trouble at the "Install the Win 7 ISO) I`ll either come back here or on to gregrocker`s site.
 

My Computer My Computer

Computer type
PC/Desktop
Computer Manufacturer/Model Number
Mesh
OS
Windows 7 Home Premium Upgrade designed for Windows Vista
Browser
Internet Explorer
You're most welcome. :)

I hope it goes smoothly for you. You'll be able to close "Windows Setup" after booting from the USB to cancel without doing anything yet.
 

My Computer My Computer

Computer type
PC/Desktop
Computer Manufacturer/Model Number
Self built custom
OS
64-bit Windows 11 Pro for Workstations
CPU
Intel i7-8700K OC'd to 5 GHz
Motherboard
ASUS ROG Maximus XI Formula Z390
Memory
64 GB (4x16GB) G.SKILL TridentZ RGB DDR4 3600 MHz
Graphics Card(s)
ASUS ROG-STRIX-GTX1080TI-O11G-GAMING
Sound Card
Integrated
Monitor(s) Displays
2 x Samsung Odyssey G7 27"
Screen Resolution
2560x1440
Hard Drives
1TB Samsung 990 PRO M.2,
4TB Samsung 990 PRO PRO M.2,
TerraMaster F8 SSD Plus NAS
PSU
Seasonic Prime Titanium 850W
Case
Thermaltake Core P3
Cooling
Corsair Hydro H115i
Keyboard
Logitech wireless K800
Mouse
Logitech MX Master 4
Internet Speed
2 Gb/s Download and 100 Mb/s Upload
Antivirus
Malwarebyte Anti-Malware Premium
Browser
Google Chrome
Other Info
Logitech Z625 speaker system,
Logitech BRIO 4K Pro webcam,
HP Color LaserJet Pro MFP M477fdn,
APC SMART-UPS RT 1000 XL - SURT1000XLI,
Galaxy S23 Plus phone
Thanks. I`ll post if I have any problems. Otherwise assume ok. I can always make another copy of course.
 

My Computer My Computer

Computer type
PC/Desktop
Computer Manufacturer/Model Number
Mesh
OS
Windows 7 Home Premium Upgrade designed for Windows Vista
Browser
Internet Explorer
Hi, Thanks brink once again,

I will try with another source.
Can i copy the contents of install dvd to the computer folder and then try the copy from computer. This i ask , is because, when you copy from dvd to computer, will there be any change in change of file size of bytes. i noticed somewhere, the size actual and the size it occupies in the computer are shown as different.
 

My Computer My Computer

Computer type
PC/Desktop
Computer Manufacturer/Model Number
custom build
OS
Microsoft Windows 7 Ultimate 64-bit 7601 Multiprocessor Free Service Pack 1
CPU
Intel(R) Core(TM)2 Duo CPU E7200 @ 2.53GHz
Motherboard
To be filled by O.E.M. To be filled by O.E.M.
Memory
4.00 GB
Graphics Card(s)
NVIDIA GeForce 210
Sound Card
(1) NVIDIA High Definition Audio (2) Realtek High Definiti
Screen Resolution
1920 x 1080 x 32 bits (4294967296 colors) @ 60 Hz
Hard Drives
ST3500312CS ATA Device
You can, but you said it gave you an error when you already tried though. :(
 

My Computer My Computer

Computer type
PC/Desktop
Computer Manufacturer/Model Number
Self built custom
OS
64-bit Windows 11 Pro for Workstations
CPU
Intel i7-8700K OC'd to 5 GHz
Motherboard
ASUS ROG Maximus XI Formula Z390
Memory
64 GB (4x16GB) G.SKILL TridentZ RGB DDR4 3600 MHz
Graphics Card(s)
ASUS ROG-STRIX-GTX1080TI-O11G-GAMING
Sound Card
Integrated
Monitor(s) Displays
2 x Samsung Odyssey G7 27"
Screen Resolution
2560x1440
Hard Drives
1TB Samsung 990 PRO M.2,
4TB Samsung 990 PRO PRO M.2,
TerraMaster F8 SSD Plus NAS
PSU
Seasonic Prime Titanium 850W
Case
Thermaltake Core P3
Cooling
Corsair Hydro H115i
Keyboard
Logitech wireless K800
Mouse
Logitech MX Master 4
Internet Speed
2 Gb/s Download and 100 Mb/s Upload
Antivirus
Malwarebyte Anti-Malware Premium
Browser
Google Chrome
Other Info
Logitech Z625 speaker system,
Logitech BRIO 4K Pro webcam,
HP Color LaserJet Pro MFP M477fdn,
APC SMART-UPS RT 1000 XL - SURT1000XLI,
Galaxy S23 Plus phone
Hi, Thanks for jet speed reply,
But why it shows two size of storage ? Do you know? I am trying to recover the contents thro recovery tools if possible
 

My Computer My Computer

Computer type
PC/Desktop
Computer Manufacturer/Model Number
custom build
OS
Microsoft Windows 7 Ultimate 64-bit 7601 Multiprocessor Free Service Pack 1
CPU
Intel(R) Core(TM)2 Duo CPU E7200 @ 2.53GHz
Motherboard
To be filled by O.E.M. To be filled by O.E.M.
Memory
4.00 GB
Graphics Card(s)
NVIDIA GeForce 210
Sound Card
(1) NVIDIA High Definition Audio (2) Realtek High Definiti
Screen Resolution
1920 x 1080 x 32 bits (4294967296 colors) @ 60 Hz
Hard Drives
ST3500312CS ATA Device
Hi, Brink, I value your replies and you are the savior most of the time.
Please, also say, about those two options if you insert a blank dvd or cd in win 7 machine. It asks you to select one option. What is the difference between the two? Which should one prefer.
The options notes are too confusing, hence i asked you.
Did the first option of usb: means you could just copy and delete paste as in pendrive
I am totally confused to get this prompt, which was not in xp model
 

My Computer My Computer

Computer type
PC/Desktop
Computer Manufacturer/Model Number
custom build
OS
Microsoft Windows 7 Ultimate 64-bit 7601 Multiprocessor Free Service Pack 1
CPU
Intel(R) Core(TM)2 Duo CPU E7200 @ 2.53GHz
Motherboard
To be filled by O.E.M. To be filled by O.E.M.
Memory
4.00 GB
Graphics Card(s)
NVIDIA GeForce 210
Sound Card
(1) NVIDIA High Definition Audio (2) Realtek High Definiti
Screen Resolution
1920 x 1080 x 32 bits (4294967296 colors) @ 60 Hz
Hard Drives
ST3500312CS ATA Device
I'm not sure what you mean by inserting a blank CD/DVD. You would want to use a USB flash drive to do this tutorial with.

It would be best to have a Windows 7 Ultimate ISO file to use to create the bootable USB with.

Which specific steps in which option do you need clarified more? :)
 

My Computer My Computer

Computer type
PC/Desktop
Computer Manufacturer/Model Number
Self built custom
OS
64-bit Windows 11 Pro for Workstations
CPU
Intel i7-8700K OC'd to 5 GHz
Motherboard
ASUS ROG Maximus XI Formula Z390
Memory
64 GB (4x16GB) G.SKILL TridentZ RGB DDR4 3600 MHz
Graphics Card(s)
ASUS ROG-STRIX-GTX1080TI-O11G-GAMING
Sound Card
Integrated
Monitor(s) Displays
2 x Samsung Odyssey G7 27"
Screen Resolution
2560x1440
Hard Drives
1TB Samsung 990 PRO M.2,
4TB Samsung 990 PRO PRO M.2,
TerraMaster F8 SSD Plus NAS
PSU
Seasonic Prime Titanium 850W
Case
Thermaltake Core P3
Cooling
Corsair Hydro H115i
Keyboard
Logitech wireless K800
Mouse
Logitech MX Master 4
Internet Speed
2 Gb/s Download and 100 Mb/s Upload
Antivirus
Malwarebyte Anti-Malware Premium
Browser
Google Chrome
Other Info
Logitech Z625 speaker system,
Logitech BRIO 4K Pro webcam,
HP Color LaserJet Pro MFP M477fdn,
APC SMART-UPS RT 1000 XL - SURT1000XLI,
Galaxy S23 Plus phone
Hi, Those are sub questions, which i have informed in my posts.
I tried your tutorial on another source, i could get the data back to the computer and then followed your tutotial and it was success. To test that , i used plpbt.iso, as i have older system, to test boot from usb. I do not have usb in my bios. Thanks for all the tips.
But one thing, the starting windows bar is somewhat slow before getting to install windows screen. What would be the reason. Is it because of the port of usb, i.e., port version. Or is that something other than that. Normally, the bar moves fast to get in to install windows.
One more query: is the select partition 1 command necessary , after creating primary partition command. in the usb.
Thank you once again.
The general questions have been asked as the show of dialog box, in xp and windows 7, when you put your blank cd or dvd confused me. hope to get replies
 

My Computer My Computer

Computer type
PC/Desktop
Computer Manufacturer/Model Number
custom build
OS
Microsoft Windows 7 Ultimate 64-bit 7601 Multiprocessor Free Service Pack 1
CPU
Intel(R) Core(TM)2 Duo CPU E7200 @ 2.53GHz
Motherboard
To be filled by O.E.M. To be filled by O.E.M.
Memory
4.00 GB
Graphics Card(s)
NVIDIA GeForce 210
Sound Card
(1) NVIDIA High Definition Audio (2) Realtek High Definiti
Screen Resolution
1920 x 1080 x 32 bits (4294967296 colors) @ 60 Hz
Hard Drives
ST3500312CS ATA Device
jraju,

If you have USB 2.0 instead of USB 3.0, then it would load slower from the USB like that.

Yes, you would want to use select partition 1 in step 9 of Option Three to make sure the correct partition is made active in step 10.
 

My Computer My Computer

Computer type
PC/Desktop
Computer Manufacturer/Model Number
Self built custom
OS
64-bit Windows 11 Pro for Workstations
CPU
Intel i7-8700K OC'd to 5 GHz
Motherboard
ASUS ROG Maximus XI Formula Z390
Memory
64 GB (4x16GB) G.SKILL TridentZ RGB DDR4 3600 MHz
Graphics Card(s)
ASUS ROG-STRIX-GTX1080TI-O11G-GAMING
Sound Card
Integrated
Monitor(s) Displays
2 x Samsung Odyssey G7 27"
Screen Resolution
2560x1440
Hard Drives
1TB Samsung 990 PRO M.2,
4TB Samsung 990 PRO PRO M.2,
TerraMaster F8 SSD Plus NAS
PSU
Seasonic Prime Titanium 850W
Case
Thermaltake Core P3
Cooling
Corsair Hydro H115i
Keyboard
Logitech wireless K800
Mouse
Logitech MX Master 4
Internet Speed
2 Gb/s Download and 100 Mb/s Upload
Antivirus
Malwarebyte Anti-Malware Premium
Browser
Google Chrome
Other Info
Logitech Z625 speaker system,
Logitech BRIO 4K Pro webcam,
HP Color LaserJet Pro MFP M477fdn,
APC SMART-UPS RT 1000 XL - SURT1000XLI,
Galaxy S23 Plus phone
Hi, Thank you very much.

That command select partition 1 in 9th Step, thus make the entire pendrive as active. Is that correct? Please tell , what would be the result, if it is not made active. Pendrive supposed to be active when inserted. Is it not? Pendrive is a storage device, so, your command makes the entire pendrive partition as active. Please
How to know , that my usb is having 2.0 or 3.0. i do not find any mention in the device manager usb ports.
is there any software, that would show, the version of our ports, if those are connected?
Thanking you,
 

My Computer My Computer

Computer type
PC/Desktop
Computer Manufacturer/Model Number
custom build
OS
Microsoft Windows 7 Ultimate 64-bit 7601 Multiprocessor Free Service Pack 1
CPU
Intel(R) Core(TM)2 Duo CPU E7200 @ 2.53GHz
Motherboard
To be filled by O.E.M. To be filled by O.E.M.
Memory
4.00 GB
Graphics Card(s)
NVIDIA GeForce 210
Sound Card
(1) NVIDIA High Definition Audio (2) Realtek High Definiti
Screen Resolution
1920 x 1080 x 32 bits (4294967296 colors) @ 60 Hz
Hard Drives
ST3500312CS ATA Device
Hi
An active device is more likely to show up on the boot menu than one that is not marked as active
It is more likely to prompt to press any key to continue to boot to it automatically too as Rufus adds that feature it the device :)
 

My Computer My Computer

Computer type
PC/Desktop
Computer Manufacturer/Model Number
Custom assembled by me :}
OS
Win-7-Pro64bit 7-H-Prem-64bit
CPU
i7-5930K 2nd i9-9940x both water blocked VRM's too
Motherboard
ASUS SABERTOOTH X99 2nd ASUS x299 Apex
Memory
Trident-z 3200C14 2nd Trident-z 3600C16
Graphics Card(s)
EVGA 1080ti ftw3 2nd Titan Xp both water blocked
Sound Card
Built-in Realtek
Monitor(s) Displays
1-AOC G2460PG 24"G-Sync 144Hz/ 2nd 1-ASUS VG248QE 24" 144Hz
Screen Resolution
1920 x 1080 144Hz
Hard Drives
2-Samsung M.2 Evo & Evo Plus
2-Samsung 850 EVO 500GB SSD's/ 3-2.5 W.D. Black 1tb-&3-1tb/3-3.5 WD Black 1tb hdd's
PSU
EVGA SuperNOVA 1000-P2 2nd 1200-P2
Case
2-Corsair Obsidian Series 450D Black ATX Mid Tower
Cooling
Custom water loops
Keyboard
Logitech G710+/ 2nd Logitech G910
Mouse
2-RedDragon M901 Perdition 16400 dpi Gaming mouse = wired
Internet Speed
Comcast Ping 19ms 89.31mbps download speed 6.12mbps upload
Antivirus
Malwarebytes Pro/ Superantispyware Pro
Browser
FireFox & Pale moon
Other Info
2nd ASUS X299 Apex/Intel i9-9940x with Custom water loop/7H-Prem-x64/Corsair 450D case/Ram Trident-z 3600C16 4x8gb / Samsung970Evo plus 500gb SSD/Dual ssd EZ swap evo/PSU EVGA SuperNova 1200w-P2 80+Platinum/GPU Titan Xp /8-ML-140 on push-pull on 2-280GTX rads
RE: Manually Create Bootable Windows 7 Installation USB Flash Drive

Hi
Option 2 worked for me, using RUFUS and IMGBURN.
I had copied and pasted the Win7 Installation files on my ext HDD, but after it whole process, I now have a bootable Win 7 USB drive.

Thanks.
 
Last edited:

My Computer My Computer

Computer type
PC/Desktop
Computer Manufacturer/Model Number
HP
OS
Windows 7 Home Premium 32bit
CPU
AMD Turion
I'm glad it could help Tony. :)
 

My Computer My Computer

Computer type
PC/Desktop
Computer Manufacturer/Model Number
Self built custom
OS
64-bit Windows 11 Pro for Workstations
CPU
Intel i7-8700K OC'd to 5 GHz
Motherboard
ASUS ROG Maximus XI Formula Z390
Memory
64 GB (4x16GB) G.SKILL TridentZ RGB DDR4 3600 MHz
Graphics Card(s)
ASUS ROG-STRIX-GTX1080TI-O11G-GAMING
Sound Card
Integrated
Monitor(s) Displays
2 x Samsung Odyssey G7 27"
Screen Resolution
2560x1440
Hard Drives
1TB Samsung 990 PRO M.2,
4TB Samsung 990 PRO PRO M.2,
TerraMaster F8 SSD Plus NAS
PSU
Seasonic Prime Titanium 850W
Case
Thermaltake Core P3
Cooling
Corsair Hydro H115i
Keyboard
Logitech wireless K800
Mouse
Logitech MX Master 4
Internet Speed
2 Gb/s Download and 100 Mb/s Upload
Antivirus
Malwarebyte Anti-Malware Premium
Browser
Google Chrome
Other Info
Logitech Z625 speaker system,
Logitech BRIO 4K Pro webcam,
HP Color LaserJet Pro MFP M477fdn,
APC SMART-UPS RT 1000 XL - SURT1000XLI,
Galaxy S23 Plus phone
Good Day,
Hi, Sir. Brink actually I'm new here. I'm really happy that I joined seven forums now I can fixed my issue w/ my laptop but sad to say I still dont get everything. I'm sorry but I was able to create a bootable USB 8Gig with the option 2 then I copied the boot folder from other computer which runs windows 7 then I tried open my laptop but still receiving the error "BOOTMGR is missing". I don't have an option to f8 because my laptop is totally messed up with the VIRUS, HOMEGROUP, MALWARE, FAKE ADOBE, INTEL, MS OFFICE, REMOTE, ETC. I'm trying to resolve this for months and do a research. My BIOS is also messed up does have a BOOT option/menu. Please help me guys and sorry for my bad english.
 

My Computer My Computer

Computer type
Laptop
Computer Manufacturer/Model Number
TOSHIBA TECRA R840
OS
Windows 7 Ultimate 64/32 bit
CPU
Intel (R) Core (TM) i5-2520M
Motherboard
N/A
Memory
8192 MB
Graphics Card(s)
N/A
Hard Drives
C:
Mouse
LENOVO CNC:C-9207
Internet Speed
1 MBPS (SUCKS)
Antivirus
Microsoft Essentials
Browser
Google Chrome and Internet Explorer
Other Info
CPU Speed: 2.50GHz
System Bios Version: 4.10
EC Version: 1.60
Back
Top