Add and Change System OEM Support Information in Windows 7 and Windows 8
Information
This tutorial will show you how to customize your System properties window by adding a logo, manufacturer, model, hours, phone, and website support OEM information of your choice in Windows 7 and Windows 8.
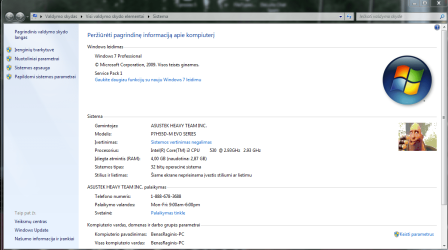
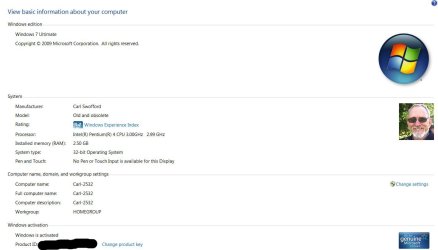
EXAMPLE: System Support Information
NOTE: This is the default (left screenshot) and custom (right screenshot) System window when you right click on Computer in the Start Menu and click on Properties, or when you open the Control Panel (icons view) and click on the System icon.


OPTION ONE
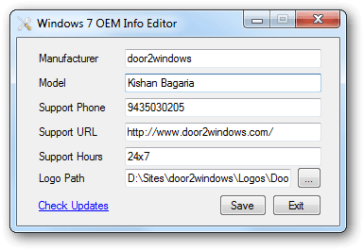
Add and Change System Support Information using "WinBubble"
2. Run WinBubble, and fill out the OEM info, and click/tap on Apply.

3. The newly added info should be there now.

OPTION TWO
Add and Change System Support Information in Registry Editor
3. In regedit, go to: (See screenshot below)
Code:
HKEY_LOCAL_MACHINE\SOFTWARE\Microsoft\Windows\CurrentVersion\OEMInformation
4. To Add a Logo Image
NOTE: The logo must be a BMP image file and cannot be larger than 120x120 pixels in size. The logo must stay in the location specified by you in step 4D below for it to continue to be used, so store it somewhere it will not get deleted. A) In the right pane, right click on an empty area, and click on New and String Value. (see screenshot below)
B) Type Logo, and press Enter. (see screenshot above)
NOTE: To undo this, right click on Logo, click on Delete, and on OK to confirm.

C) Right click on Logo, and click on Modify.
D) Type in the full path of the logo (BMP file) location, and click/tap on OK. (see screenshot below)
EXAMPLE: C:\Windows\System32\Seven_Forums.bmp

5. To Add a Manufacturer Name A) In the right pane, right click on an empty area, and click on New and String Value. (see screenshot below)
B) Type Manufacturer, and press Enter.
NOTE: To undo this, right click on Manufacturer, and click on Delete and on OK to confirm.

C) Right click on Manufacturer, and click/tap on Modify.
D) Type in a manufacturer name (ex: Shawn Brink), and click/tap on OK. (see screenshot below)

6. To Add a Model Number A) In the right pane, right click on an empty area, and click on New and String Value. (see screenshot below)
B) Type in Model, and press Enter.
NOTE: To undo this, right click on Model, and click on Delete and on OK to confirm.

C) Right click on Model, and click on Modify.
D) Type in a your computer's model number, and click on OK. (see screenshot below)

7. To Add Support Hours A) In the right pane, right click on an empty area, and click on New and String Value. (see screenshot below)
B) Type in SupportHours, and press Enter.
NOTE: To undo this, right click on SupportHours and click on Delete. Click on OK to confirm.

C) Right click on SupportHours, and click on Modify.
D) Type in your support hours, and click on OK. (See screenshot below)
EXAMPLE: 24 Hours - 7 Days a Week

8. To Add a Support Phone Number A) In the right pane, right click on an empty area, and click on New and String Value. (see screenshot below)
B) Type SupportPhone, and press Enter.
NOTE: To undo this, right click on SupportPhone,and click on Delete. Click on OK to confirm.

C) Right click on SupportPhone, and click on Modify.
D) Type in a phone number, and click on OK. (see screenshot below)

9. To Add a Support Website URL Address A) In the right pane, right click on an empty area, and click on New and String Value. (see screenshot below)
B) Type SupportURL, and press Enter.
NOTE: To undo this, right click on SupportURL,and click on Delete. Click on OK to confirm.

C) Right click on SupportURL, and click on Modify.
D) Type in your support URL web address, and click on OK. (see screenshot below)
NOTE: In System, it will be a URL link that says Online Support, but will go to the address you typed in.

10. Close Regedit.
11. Close and reopen the System window to see your changes.
That's it,
Shawn
Attachments
Last edited:
")

")
 (UK).
(UK).